How to Remove Mould From Silicone (Without It Coming Back)
As an Amazon Associate we earn from qualifying purchases. Some links on this page are affiliate links, which means we may earn a small commission if you make a purchase.
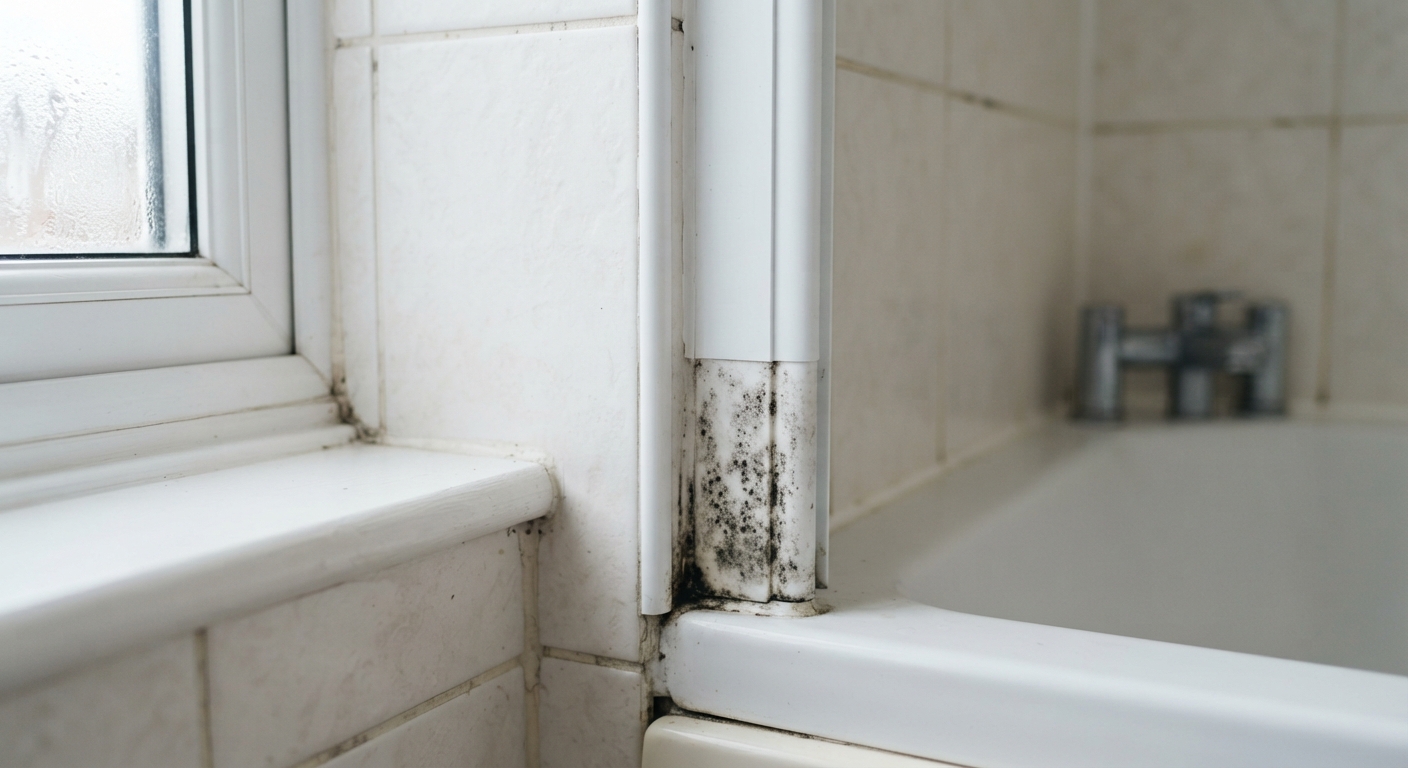
You’ve scrubbed the black spots from your bathroom sealant, let the bleach sit, wiped it clean — and within a fortnight, there they are again. It’s frustrating, but you’re not doing anything wrong. The approach most people take to mouldy silicone is the reason it keeps coming back, and understanding why changes what you do next.
This guide covers the two real options for dealing with mould on silicone, grout and window seals: cleaning it and replacing it. More importantly, it explains why one of those options is fundamentally a temporary measure, and what to do about it — whether you’re a homeowner or a tenant with rights your landlord needs to respect.
The Two Ways to Deal With Mould on Silicone
There are only two approaches to mouldy silicone sealant: clean it or replace it. Cleaning removes what you can see. Replacing removes what’s underneath. The choice between them isn’t about preference — it’s about how deep the mould has got and whether you’re likely to be dealing with it again in six months.
Here’s the honest breakdown:
Cleaning works on the surface. It gets rid of the black discolouration and makes the sealant look presentable. What it can’t do is reach mould that’s already working its way through the material itself. Think of it like repainting a wall with damp in the plaster — it looks fine for a while.
Replacing means cutting out the old sealant entirely and applying a fresh bead. It’s more effort and cost upfront, but it addresses the root of the problem rather than just the symptom.
The practical decision comes down to three things: how bad the mould is, how often the area gets wet, and whether you’re happy to repeat a surface clean every few months or would rather fix it once and move on.
If you’re not sure whether what you’re looking at is actually condensation-driven mould or something else — a leak, say, or rising damp — it’s worth knowing the difference before you spend money on either approach. Damp diagnosis
When to Clean (And What to Actually Use)
For light surface mould — the kind that’s appeared in the last month or two, on a bead that’s otherwise intact — a dedicated mould remover is the right tool. Plain bleach is what most people reach for, and it will whiten the surface, but it doesn’t fully kill mould that’s established in porous material. Specialist products are formulated to work on the cell structure rather than just bleaching the colour away.
The products that come up repeatedly in owner feedback are HG Mould Remover (paid link), Dettol Mould & Mildew Remover (paid link) (sold as a 3-pack) and Astonish Mould & Mildew (paid link). HG in particular is described by users as fast-acting and requiring minimal scrubbing — a point worth knowing if you’re doing this on your hands and knees in a shower tray. The trade-off is the smell: these products are potent, and good ventilation isn’t optional. It’s the difference between the job working and you spending the evening with a sore throat. Open a window, wear gloves, and consider eye protection if you’re applying to a shower screen above head height.
Check price on Amazon → (paid link)
Step by step, the process is:
- Dry the area — wipe away surface water so the product contacts the sealant, not a film of dilution.
- Apply the mould remover generously over the affected bead. Don’t just spot-treat the black bits.
- Leave it for the time the product specifies — usually 10 to 30 minutes. Don’t rush this.
- Wipe clean with a damp cloth or rinse with water.
- Dry the area thoroughly — this part matters more than most people realise.
The step people skip is drying. If you clean the mould away and leave the area damp, you’ve just reset the clock. Wipe dry after cleaning, and if the room has poor ventilation, leave an extractor fan running or a window cracked open for a while afterward.
One important caveat: cleaning is a maintenance task, not a cure. If the mould returns within a couple of months, that tells you something. It’s not that you cleaned it badly — it’s that the conditions that allow mould to grow haven’t changed.
The “Why It Keeps Coming Back” Mechanism
Most cleaning guides skip this, but it’s the reason this article exists.
Mould does not sit on the surface of silicone sealant. It grows through it. Silicone is water-resistant but microscopically porous — the hyphae, the root-like filaments that make up the mould organism, penetrate into the matrix of the sealant itself. What you see on the surface is the reproductive spore heads, the bloom. The roots are already inside.
This means cleaning removes the visible part. The mould remains embedded in the material and, within two to four weeks, regrows to the surface from within. The old sealant provides both a food source — acetic acid cure silicone contains organic compounds that mould can metabolise — and a water reservoir in its microscopic pores.
The UK’s Building Research Establishment (BRE) identifies silicone sealant as “unavoidably susceptible to mould colonisation” in bathroom environments, and its guidance recommends replacement rather than repeated cleaning for sealant that’s showing persistent mould. That’s not a product endorsement — it’s building science.
If you’re dealing with a bathroom that sees daily use, poor ventilation, and a sealant that’s already showing deep black staining, cleaning will buy you weeks at best. The mould isn’t on the silicone. It’s in it. The only permanent fix for that situation is to remove and replace the bead entirely.
This is also why preventive maintenance matters more here than with most other cleaning jobs. Sanitary silicone contains a fungicide and will resist mould for longer than standard silicone, but eventually every sealant in a wet area needs replacing. The typical lifespan is three to five years. Think of it as maintenance — not a one-off fix.
Now you know what you’re dealing with — Get the Free Damp & Mould Diagnosis Checklist to make sure you’re tackling the right problem.
When to Replace the Silicone Sealant
There are three situations where replacement is the right call, not cleaning:
- The mould is deep-set and returns within weeks of a thorough clean
- The sealant is cracking, peeling or has come away from the surface at any point — that’s a gap where water sits and mould thrives
- You’re in a rental property and the landlord’s responsibility is to maintain the fabric of the building, not your cleaning routine
Replacing silicone sealant is straightforward enough for a competent DIYer, though it requires patience and a steady hand more than specialist skill.
The process:
- Remove the old sealant completely. Use a sealant removal tool or a sharp utility knife to cut along both edges of the bead, then peel it away. Any residue left behind will prevent the new silicone bonding properly — this is where most DIY jobs fail.
- Clean and dry the gap thoroughly. Remove all traces of old silicone, clean the surfaces with isopropyl alcohol or a dedicated silicone prep product, and let it dry fully.
- Apply new sanitary silicone. Use a fungicide-treated product designed for wet areas — the packaging will say “sanitary” or “mould resistant.” Apply in a continuous bead, smooth with a silicone finishing tool or a wet finger (with washing-up liquid as a release agent), and leave to cure for at least 24 hours before the area gets wet.
The common DIY mistake is not removing the old silicone fully before applying new. A double bead — new silicone over the top of old — will fail at the bond within months.
Reader feedback on DIY replacement is mixed: some find it straightforward and satisfying, others find getting a neat finish harder than expected, particularly around shower corners. If you’re not comfortable doing it, a tradesperson will typically charge somewhere in the tens to low hundreds of pounds depending on the scale — get a couple of quotes, and make sure whoever you use is quoting to remove and replace, not just to silicone over the top.
Remember: new silicone delays the problem, it doesn’t eliminate it. The underlying cause — warm, wet conditions and insufficient ventilation — still needs to be addressed if you don’t want to be doing this again in three years.
Health Risks and What to Do If You’re a Tenant
The health framing here matters, because this is where a lot of anxiety lives — particularly for parents, pregnant women, and anyone with respiratory conditions.
NHS and gov.uk guidance states that damp and mould can contribute to respiratory problems, nasal congestion, and throat irritation, with higher risk for children, older people, and those with weakened immune systems. That framing is important: it’s about the condition of your home, not a diagnosis. If you’re concerned your health is being affected, speak to a GP. Don’t self-diagnose from the mould.
One practical point that gets missed: never dry brush or vacuum mould. Both methods release spores into the air in the room, which can increase exposure. Wet cleaning — the approach described in the sections above — is the right method for small affected areas.
If you’re a tenant and the mould is a recurring problem, the first thing to establish is whether it’s down to how you’re using the property or a maintenance failure your landlord is responsible for. Persistent mould that returns despite normal cleaning and ventilation — or mould that’s appearing on cold external walls or around window frames rather than just in the shower — suggests a ventilation or building fabric issue that’s not yours to fix.
Tenants have rights here. You should report the problem to your landlord in writing, keep a copy, and give them a reasonable timeframe to respond. If they don’t, your local council’s environmental health team can inspect and, where warranted, serve a notice requiring them to address the problem. For social housing tenants, Awaab’s Law means landlords have a specific legal duty to respond to serious damp and mould hazards within a defined timeframe.
If you’re in this situation, Shelter and Citizens Advice are both set up to help with the reporting process and can advise on your specific circumstances. Tenant rights and damp
Frequently Asked Questions
Can I just paint over mouldy silicone with anti-mould paint?
No. Anti-mould paint prevents new mould growing on the surface of the paint — it doesn’t kill mould underneath. Painting over silicone that’s already colonised will trap the problem, and the mould will push the paint off within a season. Clean or replace the silicone first, then paint if you want to refresh the colour.
Is bleach better than a specialist mould remover?
Specialist mould removers are generally more effective than bleach on porous surfaces like silicone and grout. Bleach whitens the surface but doesn’t fully penetrate mould roots, and on organic material it can actually feed the organism if residue remains. A dedicated product does a better job of breaking down the cell structure. For light surface cleaning between deeper treatments, diluted bleach can be adequate — but for anything that’s established, go with a specialist.
How often should I replace bathroom silicone sealant?
In wet areas that see daily use — a family bathroom, an en-suite — replacing the sealant every three to five years is a realistic maintenance schedule, even when mould isn’t yet visible. Sanitary silicone with a fungicide will buy you time, but eventually every sealant bead in a shower or around a bath will become colonised. Replacing it proactively, before mould is visibly established, is less unpleasant than dealing with a deep infestation later.
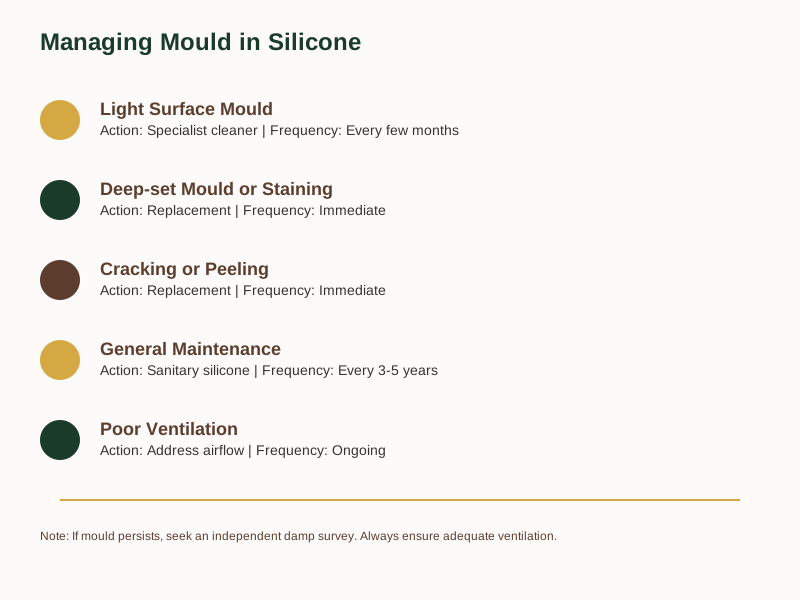
Silicone Sealant Lifespan & Maintenance
| Condition | Action | Frequency |
|---|---|---|
| Light surface mould | Specialist cleaner | Every few months |
| Deep-set mould | Replacement | Immediate |
| Cracking or peeling | Replacement | Immediate |
| General maintenance | Sanitary silicone | Every 3-5 years |
| Poor ventilation | Address airflow | Ongoing |
| Recurring mould | Replacement | Immediate |
| Visible staining | Replacement | Immediate |
Where to Go From Here
The honest summary: for light surface mould on intact sealant, a specialist cleaner buys you a few weeks and is worth doing as maintenance. For anything that’s established, deep-set, or keeps coming back within a month, cleaning is papering over the cracks — the mould is in the silicone, not on it, and the only real fix is replacement.
Whatever route you take, address the conditions that allow mould to grow in the first place: improve ventilation, wipe down condensation, and make sure the room can dry out between uses. Fix the environment, and you fix the problem long-term. Change the silicone but leave the bathroom permanently stuffy and damp, and you’ll be doing this again before you know it.
If you’re not sure whether you’re dealing with condensation-driven mould or something that needs a different kind of attention — a leak, a building defect, or a ventilation problem your landlord should be sorting — Get the Free Damp & Mould Diagnosis Checklist . It’ll help you work out what you’re actually looking at before you spend money on the wrong solution.
Related Guides
For a complete overview, see our How to Remove Black Mould From Walls Safely .
Sources & Further Reading
As an Amazon Associate we earn from qualifying purchases.
Note: General guidance only. Always verify details with a qualified professional or official source.
Check Astonish Mould & Mildew price → (paid link)
See Dettol Mould & Mildew Remover on Amazon → (paid link)