How to Tell Damp Type (Without Buying a Tester)
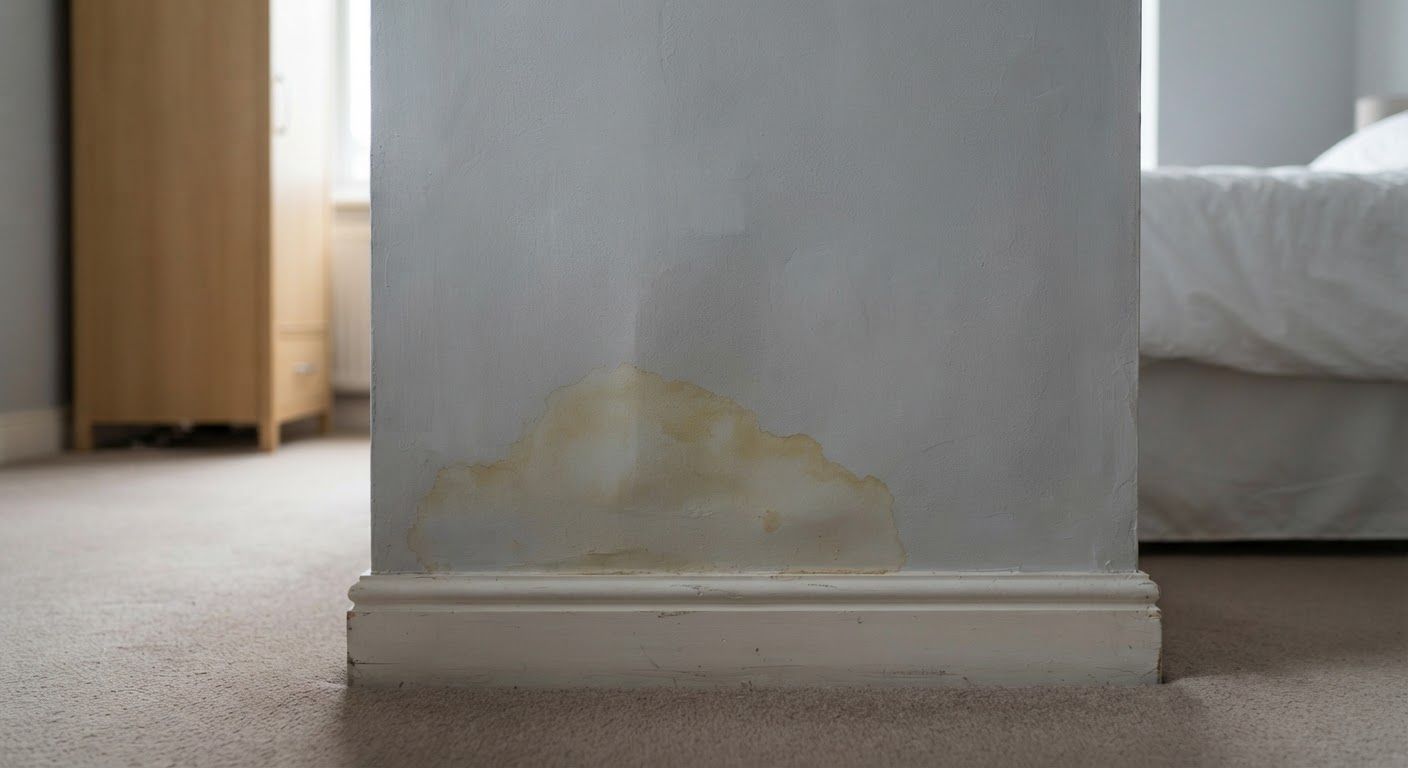
You’ve spotted a damp patch on the wall. The first thing most people do is Google “rising damp” — and within minutes they’re mentally budgeting for a damp-proof course. That reaction is exactly the mistake this article is here to fix.
Most damp in UK homes isn’t rising damp at all. It’s condensation, and a quick visual look at a wall is nowhere near enough to tell the difference. This matters because treating condensation as rising damp means spending money on a chemical DPC that won’t touch the actual problem. Treating rising damp as condensation means living with a structural issue while the wall quietly deteriorates.
The good news is there’s a straightforward DIY test that helps you work out what’s actually going on — provided you run it correctly. Most guides skip the detail that makes the difference between an accurate result and a false negative.
Why DIY Tests Can Mislead You
Before you reach for any test, it’s worth knowing why visual signs are so unreliable for identifying damp type.
The most common visual cue people fixate on is a “tide mark” — that horizontal line of damp staining on a wall. If you’ve searched “rising damp”, you’ve seen it cited as a classic symptom. But tide marks are frequently caused by condensation on cold walls, not moisture rising through the structure. Hydroscopic salts — minerals that accumulate in older solid walls, particularly around chimney breasts — can also draw moisture from the air and create a damp appearance even when the original source of moisture has long gone.
Chemical DPCs (damp proof courses) are often ineffective when walls are already damp — the injected solution needs to bond to dry masonry to form a proper barrier. If the wall is saturated, you’re essentially painting onto a wet surface. You’d be spending money on a treatment that can’t do the one job it’s meant for.
The practical advice from local authorities and housing professionals is consistent: focus on finding the moisture source, not on labelling the type of damp. Whether the issue is a leak, poor ventilation, or condensation from daily living, identifying where the water is coming from is what actually drives the fix.
The Foil Test: The 48-Hour Rule
Here’s the test most damp guides mention: stick a piece of foil to the wall, leave it overnight, and see what you find. The problem is that most guides stop there — and the missing detail is exactly what makes the difference between a useful result and a misleading one.
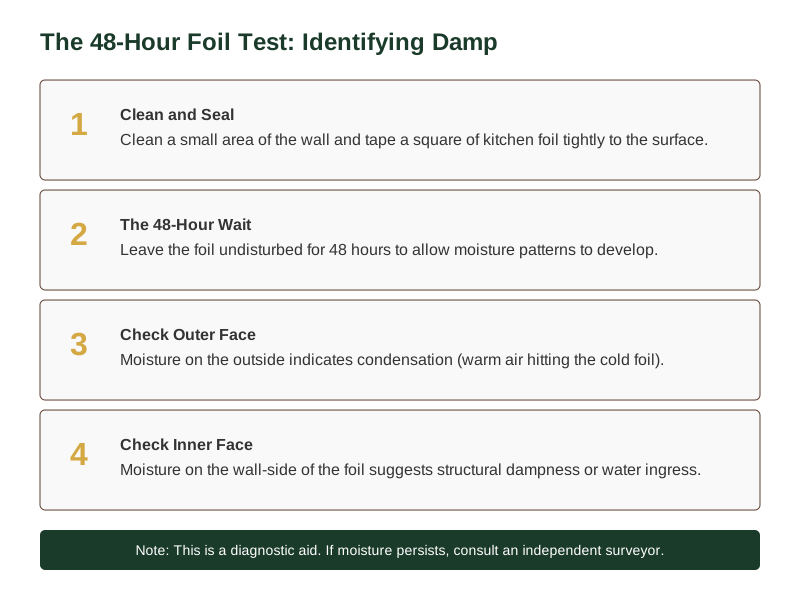
The foil test works by creating a vapour barrier. When you tape a piece of kitchen foil to a damp-looking patch, you’re stopping moisture from the room air landing on that specific surface. The critical rule is the 48-hour minimum.
Why 48 hours? Walls take time to reach thermal equilibrium — to settle at their true temperature. If you check after 20 minutes or even a few hours, the wall hasn’t had long enough to behave as it normally would. You’ll get a false result, usually missing moisture that’s genuinely there. The BRE Good Repair Guide GRG 26, which sets the standard for diagnosing damp in UK buildings, specifies a minimum of 48 hours for exactly this reason.
Once the 48 hours are up, the second critical detail is which face of the foil to check. Moisture on the outer (room-facing) face means condensation — humid air from the room is landing on a cold wall surface. Moisture on the inner (wall-facing) face means moisture is migrating through the wall itself, either penetrating damp from outside or rising damp from below.
In short: the foil isolates the wall surface from room air; after 48 hours, the wall temperature has stabilised; checking the correct face tells you whether the moisture is coming from inside the room or through the structure. Skip the 48 hours, or check the wrong face, and the test is essentially worthless.
If you’re running the test in a bathroom or kitchen, be aware that cooking and showering will significantly raise room humidity — this can make condensation results more dramatic but doesn’t invalidate the test. Just note what was happening in the house during those 48 hours.
The “Tide Mark” Myth
Let’s go back to that tide mark, because it’s the visual cue that leads to the most expensive misdiagnoses.
A tide mark on a wall — that distinctive horizontal line of damp staining, often around waist or chest height — is frequently cited as proof of rising damp. It’s the image that sells a lot of unnecessary damp-proof courses. But in most UK homes, particularly solid-wall Victorian and Edwardian terraces, tide marks are far more commonly caused by condensation.
The mechanism is straightforward: cold external walls, particularly north-facing ones, drop below the dew point of warm, moist room air during autumn and winter. Water vapour condenses on the surface, runs down, and evaporates again when the heating comes on — except at the point where air circulation is poorest, usually mid-wall height on an external wall. Over time, this leaves a visible line.
Hydroscopic salts add another layer of confusion. These are minerals — chlorides and nitrates — that accumulate in the masonry of older homes, particularly around fireplaces and chimneys where fuel was burned historically. They remain dormant in dry conditions but absorb moisture from the air when humidity rises, making the wall surface look and feel damp. Treating this as rising damp and injecting a DPC does nothing to address the salt hygroscopy — the damp returns every time the humidity climbs.
The honest answer is that a tide mark alone cannot diagnose rising damp. It can be condensation, it can be salts, or it can be penetrating damp from a defective render or missing flashing. What it cannot tell you, on its own, is which of those it is.
When to Call a Professional
The foil test has a clear exit criterion: if moisture appears on the inner (wall-facing) face of the foil, you are dealing with moisture migrating through the wall structure. That means penetration from outside, rising from below, or in some cases both. That is the point to bring in a professional.
A qualified surveyor — ideally one who is also a member of the Property Care Association — can distinguish between rising damp, penetrating damp, and other causes that look similar. The distinction matters because the fix is completely different. Penetrating damp from a defective roof, gutter, or render needs the defect found and repaired. Rising damp needs a proper DPC, installed correctly into sound masonry. Condensation needs ventilation, heating, or both. Treating the wrong cause wastes money and leaves the real problem unresolved.
Chemical DPC work is a one-off, relatively expensive intervention — it’s worth getting right. A free survey from a firm that also quotes to do the work carries an obvious conflict of interest: they sell DPCs. An independent surveyor charges for their opinion and nothing else.
Three signs you need a professional damp survey: moisture on the inner face of the foil test after 48 hours; damp patches that persist year-round regardless of season; and staining or mould that returns despite treating the surface.
If you’re a tenant and you’ve confirmed damp or mould in your home, the route is straightforward: report it to your landlord or housing association in writing. Under Awaab’s Law, social landlords in England have a legal duty to investigate and address serious damp and mould hazards within set timescales. If you’re not getting a response, your local council’s environmental health team is the next step — they have enforcement powers. Shelter and Citizens Advice can both advise on your specific situation.
For homeowners, the decision is yours, but an independent survey before accepting any quote is genuinely worth the cost. A survey typically runs roughly £150–£300. Compare that against the cost of unnecessary DPC work at £1,500–£3,000 or more, and the arithmetic is obvious.
Now you know what to look for — the 48-hour wait, the correct face to check, and what each result means. The next step is putting it together into a clear picture of what’s happening in your home.
Grab our free Get the Free Damp & Mould Diagnosis Checklist — it walks you through the full assessment process so you can report the issue accurately to a landlord, a surveyor, or both.
Damp Type Diagnosis Guide
| Test Method | Key Detail | Result Interpretation |
|---|---|---|
| Foil Test | 48-hour minimum wait | Moisture on outer face = condensation. Moisture on inner face = structural damp. |
| Visual Check | Tide marks | Often caused by condensation or salts, not necessarily rising damp. |
| Dehumidifier | Air moisture removal | Does not identify the source of moisture. |
| Salt Test | Hydroscopic minerals | Can make walls look damp even without active water ingress. |
Frequently Asked Questions
Can I use a dehumidifier to test for damp?
No. A dehumidifier removes moisture from the air but tells you nothing about where that moisture is coming from. It can lower room humidity enough that condensation stops appearing — making the problem seem to disappear while the underlying issue, whether it’s a leak or moisture migrating through a wall, continues unchanged. Use the foil test to identify the source; a dehumidifier can be part of the solution for condensation, not the diagnostic tool.
What are hydroscopic salts and how are they treated?
Hydroscopic salts are minerals — typically chlorides and nitrates — that accumulate in the masonry of older UK homes, particularly around old chimneys and fireplaces. They absorb moisture from the air when humidity rises, making a wall look and feel damp even when there is no active water ingress. Specialist salt neutralisers can reduce the hygroscopic effect, but they don’t stop moisture ingress if that is also present. The fix depends on whether salts alone are causing the issue or whether there is also penetrating or rising damp underneath.
Does black mould always mean rising damp?
No. Mould needs moisture to grow, but the moisture from condensation on a cold wall is just as capable of supporting mould growth as moisture rising through a structure. Black mould on a north-facing bedroom wall, behind a wardrobe, or in a poorly ventilated bathroom is almost always condensation. The location and pattern tell you more than the colour of the mould does.
Getting the foil test right is a small investment of patience that pays back in a much clearer picture of what’s actually going on. The 48-hour wait and checking the outer face are the two details most guides skip — they’re the ones that make the difference between a result you can act on and one that sends you down the wrong path entirely. Once you know whether the moisture is coming from the air or through the wall, you know whether to reach for a dehumidifier or pick up the phone.
Get the Free Damp & Mould Diagnosis Checklist to work through the full assessment — damp type, likely causes, and the right people to call.
Related Guides
For a complete overview, see our Is It Condensation, Rising Damp or a Leak? How to Tell the Difference .
Sources & Further Reading
Note: This information is for general guidance only. Always verify details with a qualified professional or official source.